Welcome to my Blog. This a place to share and learn all things embroidery. Here I post inspirational stories and free lessons in the form of tutorials and guides. I also share tips, tricks and teach stitches and techniques.
You will also find free patterns and designs for you to unlock your creativity. It is a great place for any creative looking to learn or find inspiration in this art form.
To stay in the loop with Dicraft you can subscribe to my newsletter and stay in touch on Instagram and Facebook.
Blog >
Stitches & Techniques
Fly stitch Fly stitch is worked the same way as you would with a detached chain stitch or lazy daisy stitch, but insert the needle a short distance away from where the first stitch emerged: Anchor the stitch by taking the needle to the back of your work each time. Long anchoring stitches can be made in varying lengths for an interesting effect....
Read More
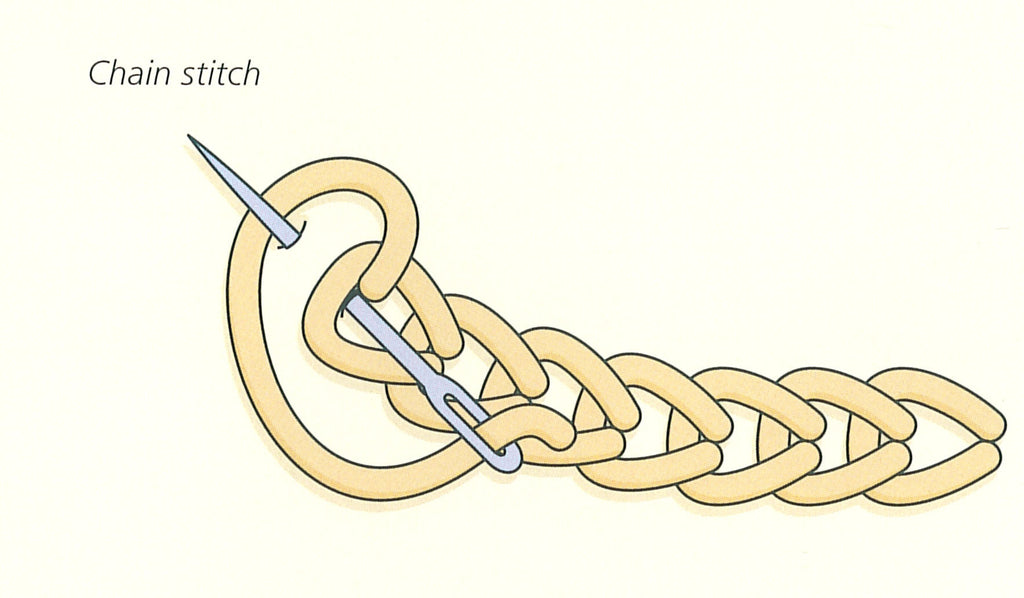
. Chain stitch To make a row of chain stitches, bring needle up from the back, and insert where the thread first came out. Exit a short distance away and this will determine the size of the stitch. The thread is under the needle each time. Pull to form a chain. Keep inserting the needle inside each chain as shown. To end off, insert the needle to the back...
Read More
Back stitch and whipped back-stitch . 1. Make a foundation row of back stitches . . 2. Wrap each stitch once (or several times) with silk ribbon or thread. . . Here is an example of where I used whipped-backstitch to form the words: Friends...
Read More
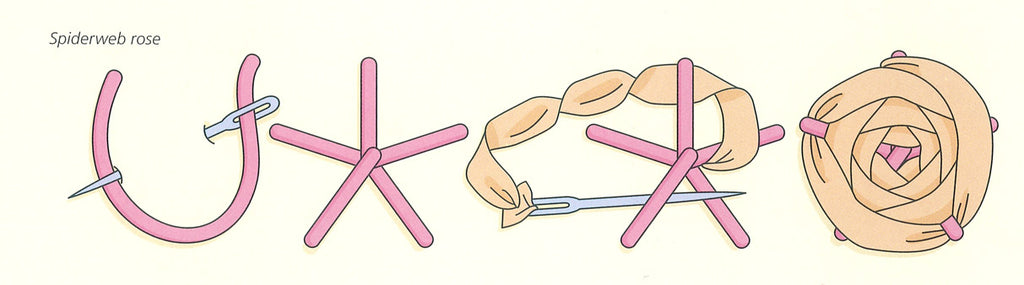
Spider-Web Rose Spider-Web Rose is a lovely stitch to use for beautiful, realistic roses. Click on the image to enlarge Use one or two strands of thread to make five foundation spokes Change to 4 or 7mm silk, or 6mm organza ribbon. Thread up and come up in the centre of the spoke. Give the ribbon a slight twist - insert needle it under and over...
Read More
Make one or many French knots in the centre of the rose. Use two strands of thread, and wrap two or three times around the needle. Or you could use 2 or 4mm silk ribbon and wrap it once or twice around your needle. Form the petals of the rose with a stem or straight stitch, working in a circular pattern. Keep going back between the previous stitches as...
Read More
French knot French knots are ideal filling stitches for background trees and other detail. Also useful for the centre of flowers. For finer detail, use one strand of thread (separate one strand from the six) For a heavier texture: use 2 or 4mm silk ribbon or perlé thread. Come up from the back and wrap the thread or ribbon two or three times around the needle. Insert the needle...
Read More
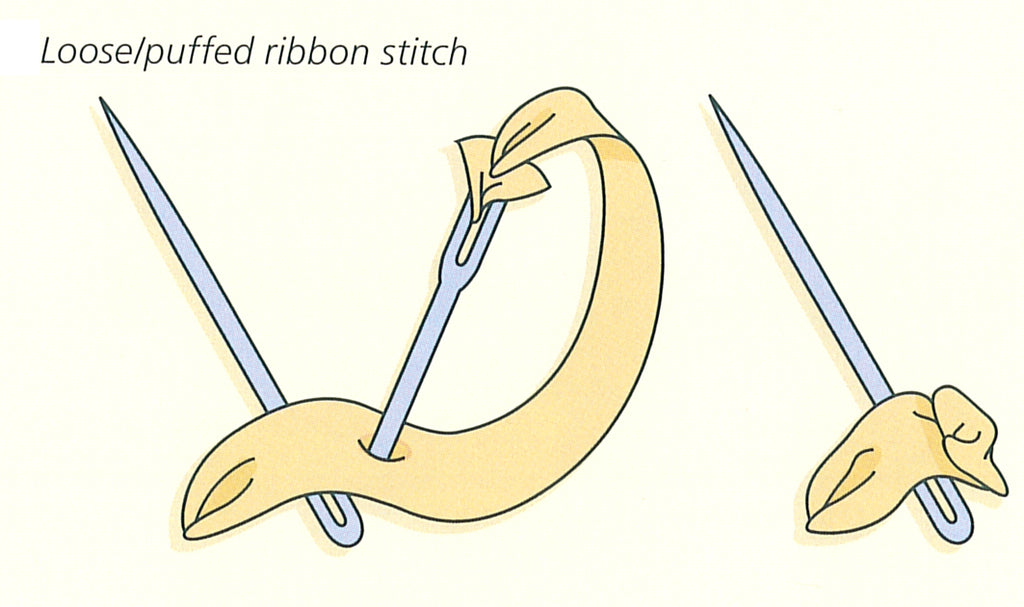
To form loose, puffed leaves, work over a spare tapestry needle (or similar object). Work with a gentle tension so that the stitches are raised off the surface of the fabric.
Stitch diagram is © Metz Press and Di van Niekerk.
Read More
Click on image to enlarge Couching: To form interesting stems and branches, or to make basket handles or bicycle wheels, couch thicker yarns or wire in place. This is a good stitch to use when the yarn is too thick to thread up in a needle. Use one or two strands of thread and couch in place as shown. See page 22 of my book: Flower Fairies™ in ribbon...
Read More
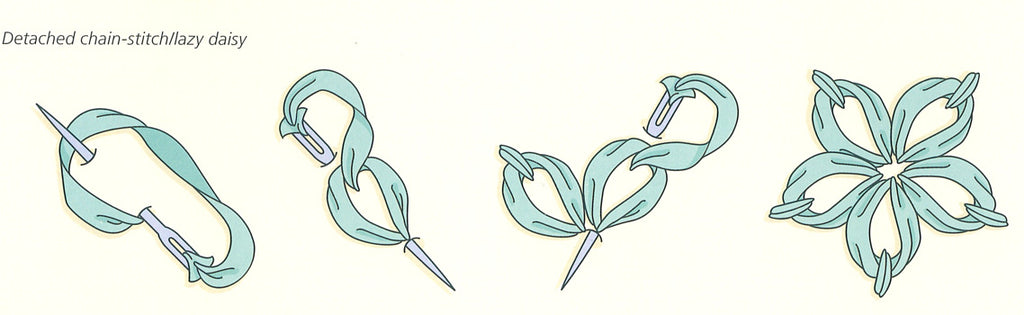
Detached chain stitch or lazy daisy: A single stitch is formed at a time for interesting leaves and a circle of stitches makes a lazy daisy flower. Come up and make a loop. Take the needle and ribbon all the way to the back, holding the loop in place. Come up inside the loop and secure it in place with a tiny stab stitch. Take the needle...
Read More
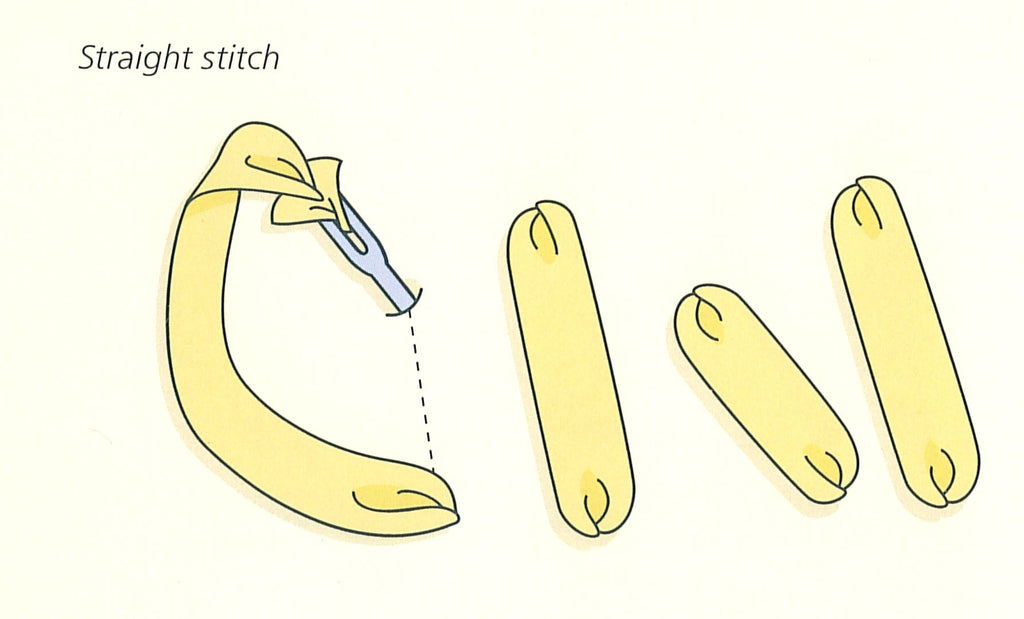
Straight stitches, worked with ribbon in different lengths, are ideal for making stems, blades of grass and thin, pointed leaves. Best worked with the fabric stretched in a hoop or frame. It is a good idea to work over a spare tapestry needle (or similar object) when you make the stitch. This way, the stitch is slightly raised up off the surface of the design. Remember to work with a...
Read More
Translation missing: en.general.search.loading