# Type at least 1 character to search # Hit enter to search or ESC to close
FREE SHIPPING for all orders over $200 ♡♡♡
Search
Browse by Category
-
-
Silk Ribbon and S...
Apr 05, 2025 -
Beautiful Ribbon ...
Mar 22, 2025
Recent Posts
- April 2025
- March 2025
- February 2025
- January 2025
Blog > Embroidering Bougainvillea or Flowering Climbers in Silk Ribbon by Di van Niekerk

Hi everybody. Happy New Year to you! May 2025 be a creative and peaceful year. I am so sorry about the terrible fires in California, we are thinking of you all and I hope you will find the strength to rebuild your lives.
.
Today I thought I would show you how to embroider Bougainvillea or Flowering Climbers in Silk Ribbon.

Build a Framework First
.
Make the thick stems
.
It’s always easier to form a framework of stems and branches first. This way when the flowers are made, they look more natural, like they are found in nature.
.Take a length of raffia and split it into thin pieces (or you could use a bouclé yarn or similar texture) and thread it on a size 18 (large) chenille needle.
.
Start at the base of the stem and work upwards. With one strand of matching thread on a separate needle, secure the raffia or yarn onto the design with tiny stab stitches. Space the stitches quite far apart as you only need to catch the raffia or yarn to secure it loosely on the design. Take the needle to the back and end off.
.
Use another piece of raffia or yarn and repeat until you are happy with the stems and branch framework. Take the needle to the back and come up to start again until you are happy with the framework.
.
Make the thin brown stems for the leaves and flowers in one or two strands of brown thread and use stem stitch or back stitch.
.
Add the Dark Shadows
.
Hint: Use a dark blue/green woolly fibre or roving to create deep shade in the design here. Secure in place with a matching thread and tiny stab stitches placed here and there.

.
Make the leaves
.
Make all the green leaves in ribbon stitch and straight stitch.
Hint: Use a gentle tension, pushing the ribbon up slightly as you pierce it to make the stitch. The leaves and flowers should be loose and puffed. Use a few different shades of green silk ribbon for a natural effect.
Here we used Di van Niekerk’s silk ribbons in various shades of green: 4mm silk ribbon in colours
Use 118 where the sunlight catches the leaves in the picture. Don’t overcrowd the leaves, leave some spaces between them for a soft finish.
.
.
Make the pink flowers
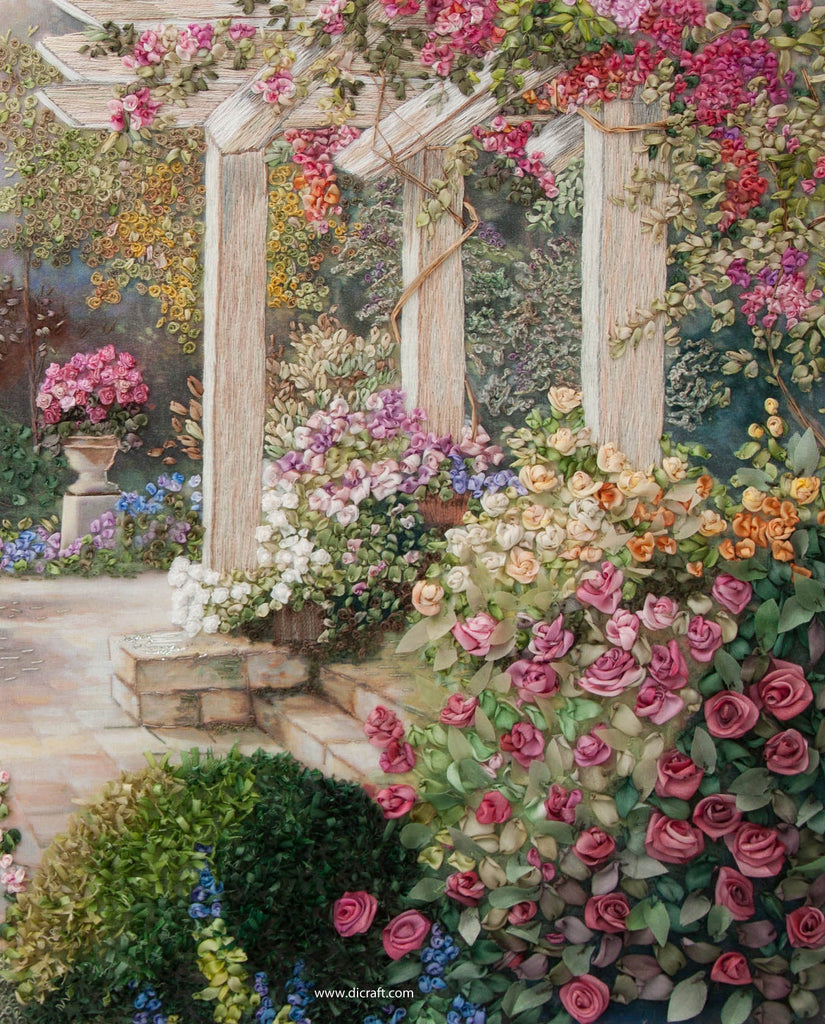
Repeat for the pink flowers, referring to the picture as a guide.
Hint: Remember to make the stitches loose and puffed by pushing the ribbon up before you pierce it to make the ribbon stitch.
It also helps to work over a spare tapestry needle as shown in the diagram below. Use the following 4mm ribbons
.
.

.
Finally, add a few more green leaves if necessary, working between the pink flowers as you did before.
This design is titled "a Beautiful Place" and I wrote detailed, step-by-step instructions for a comprehensive, easy-to- learn kit titled "Box of Lessons 9".
Have a good weekend and happy stitching!
Love
Di
♥
Shop Dicraft
Browse Dicraft
General Info
Get regular newsletters packed with tips, specials and new products!
Copyright © DI VAN NIEKERK. ALL RIGHTS RESERVED.


Leave a comment