
# Type at least 1 character to search # Hit enter to search or ESC to close
Cart


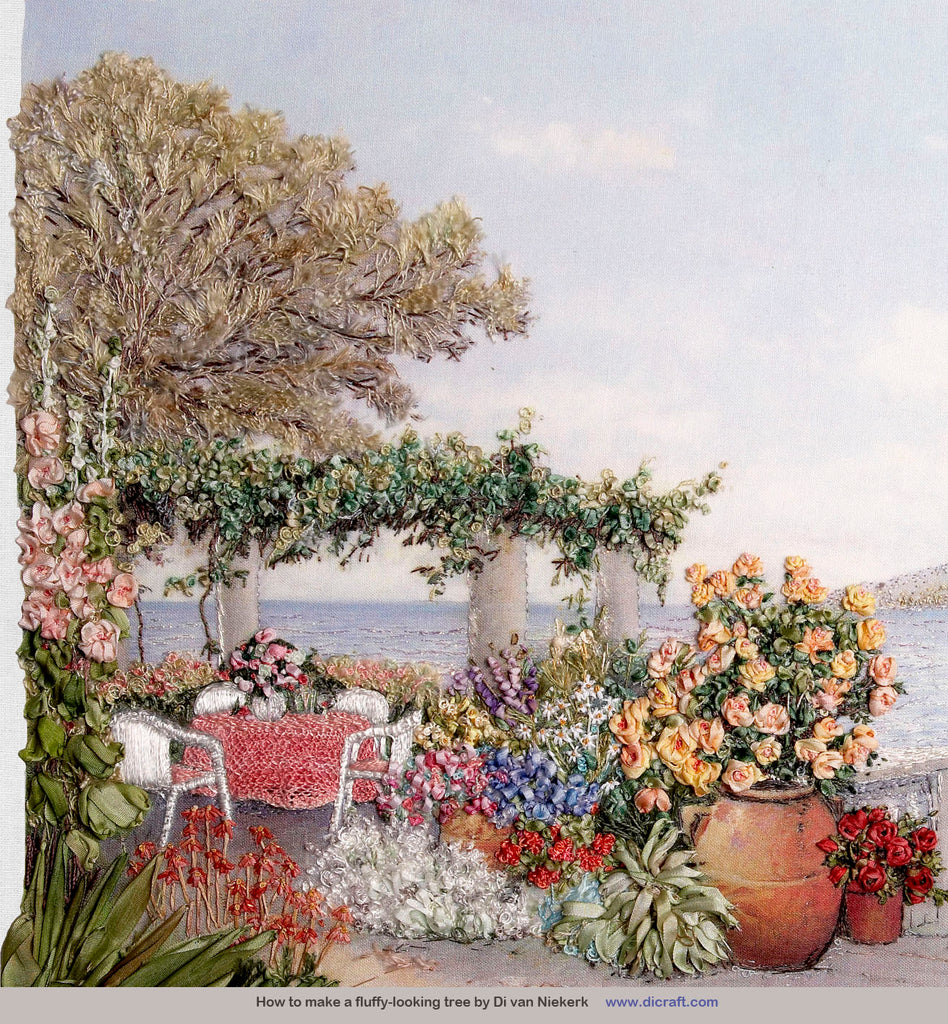
The first thing with a tree is to build the framework or the skeleton of the tree. Once you have the stem and branches in place, it’s so much easier to add the leaves so that they look as natural as possible. No matter which tree you make, whatever the project, always try to make the branches and stems first, even if they are not visible in the design. By building the framework of branches first, you will always end up with a better tree!

.
.
Thread up with the same green thread used for the branches, matching the colours as you did before. Start at the tip of the branches and form the soft, fluffy leaves in Single Knotted stitch or Turkey stitch. This will form the feathery texture. Make the loop (about 4 to 7mm or 1/8 to ¼ inch in length) over a no. 13 tapestry needle, a toothpick, a mellor or similar object.
These stitches are good for a fluffy texture; the looped stitches are cut, some are fluffed, others are not; this is how to make delicate, free-standing, feathery leaves.
Good idea: as you form each loop, pull the tapestry needle or toothpick (and loop) away from the branch: outwards, downwards, or upwards towards the sky. Don’t lift the stitch up towards you; allow it to lie flat on the fabric. Turkey stitch is useful for thicker clumps of leaves, Single knotted stitch is good for sparse, finer sections.
As each cluster is made and you have ended off at the back, cut the loops to determine the texture of the tree. Once the loops are cut and fluffed, the space fills up quickly. You will soon be able to see whether the texture is too heavy, or not. If you don’t cut the loops regularly, you may end up with too much texture in one section.
Use small embroidery scissors with sharp points. Insert the point of the scissors inside the loop. Just before you cut the loop, pull the loop outwards, downwards, or upwards towards the sky in the design, allowing the loop to lie flat on the fabric.
Cut and fluff some of the leaves slightly with the sharp point of a needle or embroidery scissors, leaving others as they are. Use the scissors or your finger tips to “brush” the leaves outwards, downwards or upwards towards the outer edge of the branch. Make some stitches fluffier, others less; this adds an interesting texture to the tree.
Refer to the close-up colour picture as you stitch. Repeat the process; note how some sections have no leaves so the branches show through. See how the tips of the tree have more leaves for a frilly edge.
.

.
Alternative stitches: if you don’t like Turkey or Single Knotted stitch, use:
-Loose, looped French knots in 1 strand of thread.
- Short, raised, Straight stitch or Ribbon stitch in 2mm green silk ribbon.
Good idea: work over a tapestry needle to raise the stitches up off the surface of the fabric.
What is the difference between Single Knotted stitch and Turkey stitch when adding texture?
There is no difference. Turkey stitch, Single Knotted stitch, Ghiordes knot, Single Knotted tufting, Tufted knot, Turkish Knot, tufted Knot stitch – they are all names for the same knotted stitches. All are pile stitches which are formed with a sequence of closely worked loops that produce a lovely carpet-like texture in a design. Used sparsely or as single stitches they make beautiful grass, feathery leaves and add interesting shadows if made in very dark green, brown or muddy colours.
I have adapted the Turkey stitch in the stitch gallery slightly. Traditionally, a back stitch is made after the loop is formed; here I have used a tiny stab stitch to secure or tie the loop in place; a neater more manageable pile is formed this way.
Turkey stitch is row after row (worked close together) one row on top of the other, to form the fur on a dog or teddy bear. Also possible are circular shapes filled with Turkey stitch; the loops are cut and fluffed to form large, raised, fluffy flowers. When making Turkey stitch, form rows of stitches above each other and fold the first row towards you as you work. If you prefer making the rows below each other, fold the previous rows upwards, out of the way, while you work the next row.
With Turkey stitch, the looped stitches are formed close together in clumps to form a dense texture. The traditional Turkey stitch or Ghiordes knot is inclined to face more towards you (forwards) than Single Knotted stitch; with Single Knotted stitch, the loops are secured at the base; with Turkey stitch they are not, and this is why the stitches face towards you. Turkey stitch is a good stitch for making furry animals or bold leaves and flowers. If a fine wool is used, the cut loops can be brushed for a furry texture.
Single Knotted stitch is the same loop-like stitch but as each stitch is made, the loop is secured to the background with a tiny Stab or stay stitch that locks the loop in place. This means that the stitch is flat against the design and can be tied to point upward, sideward, or downward; the tree is a good example of how this stitch was used. Single Knotted stitch is a good stitch to learn; I find it so useful for adding texture; one stitch or many can be made, close together or further apart, depending on the thickness required.
When I mention Single Knotted stitch, it is best to make a few stitches alongside, below, or above each other - not in rows, but rather scatter them (in no particular order or pattern) to form grass, foliage and to fill in shadows on the design. Some Single Knotted stitches aren’t cut, and the loops create an interesting effect. Other Single Knotted stitch are cut, but not fluffed, to form a slender, wispy, grass-like texture. Others are cut and fluffed to form a soft, downy texture – like the leaves in the tree in this project.
I hope you have enjoyed this tutorial, Happy Stitching! I would love to see your creations someday ♥ Please contact me when you are ready.
Happy Stitching!
Love
Di

Leave a comment