Silk Ribbon Embroidery Hint 3 by Di van Niekerk
From a series of handy hints and tips for silk ribbon embroidery to save and keep for your collection. You are most welcome to share with your students or friends.
I will be adding a new card every week until the series is complete.
This is Hint 3…
.
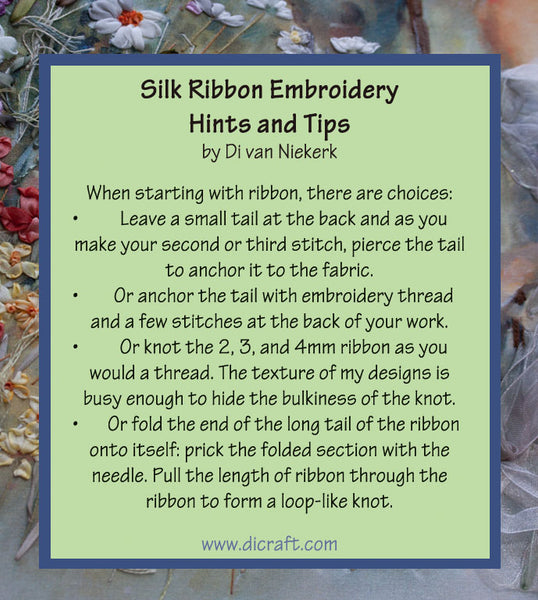
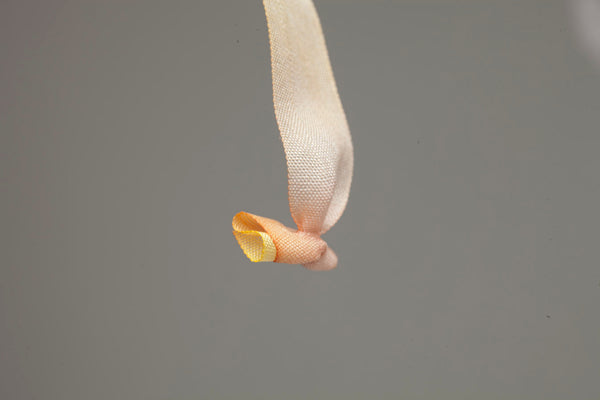
When starting with ribbon, there are choices:
• Leave a small tail at the back and as you make your second or third stitch, pierce the tail to anchor it to the fabric.
• Or anchor the tail with embroidery thread and a few stitches at the back of your work.
- Or knot the 2, 3, and 4mm ribbon as you would a thread. The texture of my embroidery panels and designs is busy enough to hide the bulkiness of the knot.
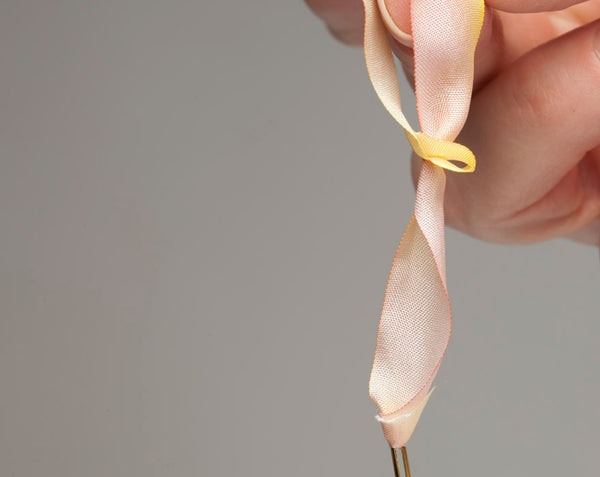
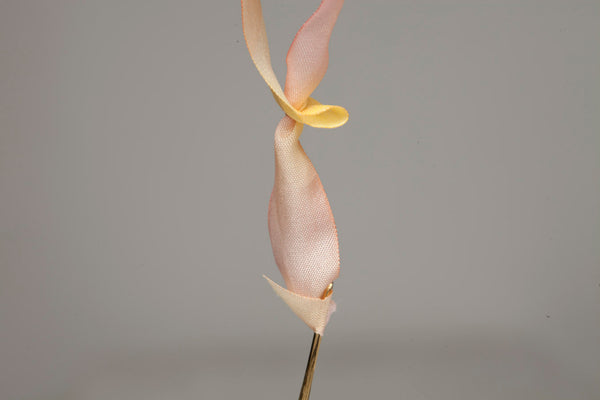
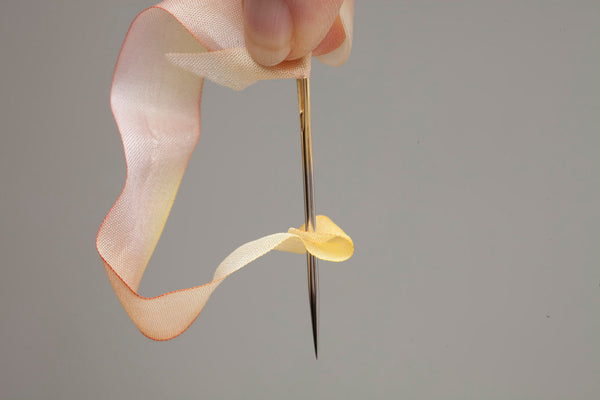
• Or fold the end of the long tail of the ribbon onto itself: prick the folded section with the needle. Pull the length of ribbon through the ribbon to form a loop-like knot.
.
.
.
.
.
.
.
.
.
.
Happy stitching!
Love
Di
♥


Adrie Lee
thank you Di for your advise.
Greetings