Welcome to my Blog. This a place to share and learn all things embroidery. Here I post inspirational stories and free lessons in the form of tutorials and guides. I also share tips, tricks and teach stitches and techniques.
You will also find free patterns and designs for you to unlock your creativity. It is a great place for any creative looking to learn or find inspiration in this art form.
To stay in the loop with Dicraft you can subscribe to my newsletter and stay in touch on Instagram and Facebook.
Hi, hello! Today I am teaching you about creating dimension and softly raised ribbon embroidery stitches. I am often asked why some stitches are soft and rounded, raised off the surface of the design and why some designs look flat and have less dimension. I will show you why. . . How to Create Pretty Stitches with Silk Ribbon that are nice and rounded, adding texture to your ribbon...
Hi good morning from a sunny Cape Town! Today I thought I'd show you how to make an embroidered hat and a basket like the two in this design. It's quite a simple technique yet it has stunning results. This is from “The Bicycle” design where the hat and basket were made separately and then stitched on to the main design. Make the Hat On a...
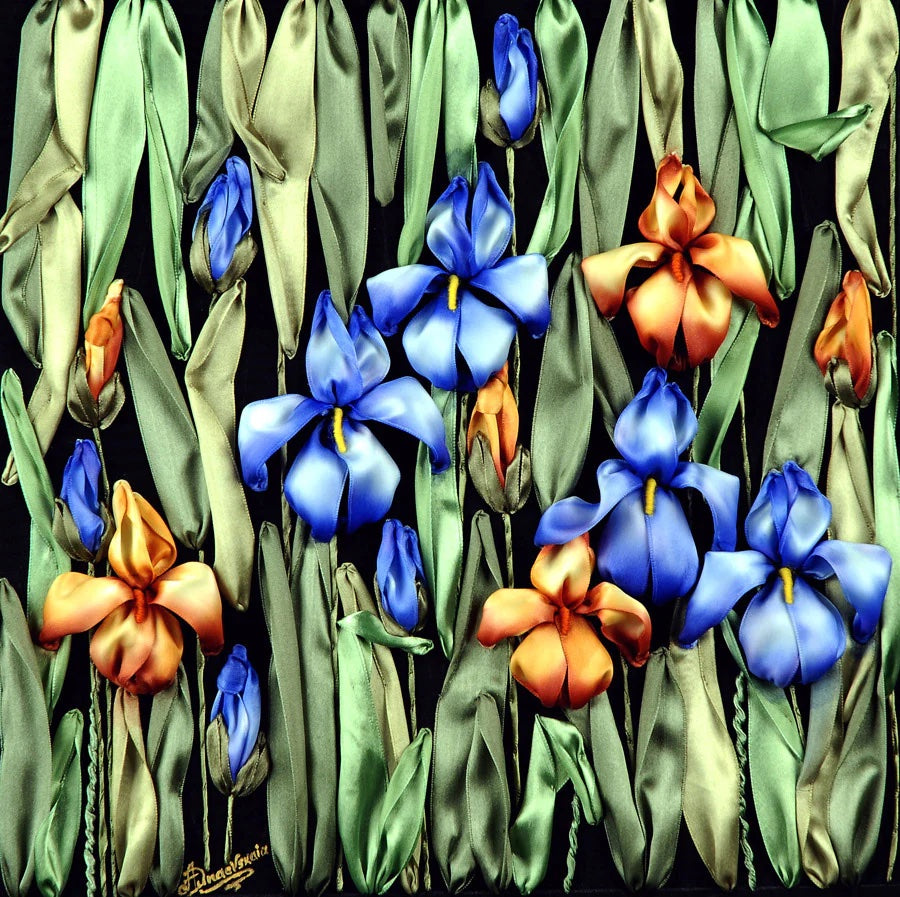
Hello everyone … today I thought I would show you how to make Irises. These are beautiful Irises by Anna Dunaevskaya. . . ... and this is a short tutorial on how to make one of the most popular flowers for ribbon embroidery! I also wrote some notes for you on a black and white diagram of Anna’s beautiful design. This should help you to see how she made her...
Hi, Hello from a sunny Cape Town! I wrote a tutorial about how to make an orange tree. If you look at my New Beginnings sampler below, you will see I used fruit and berries here too. . . In the bird panel, I used the technique to make the pink berries... . . and for the Erica in this panel, I used the same technique too... . . For...
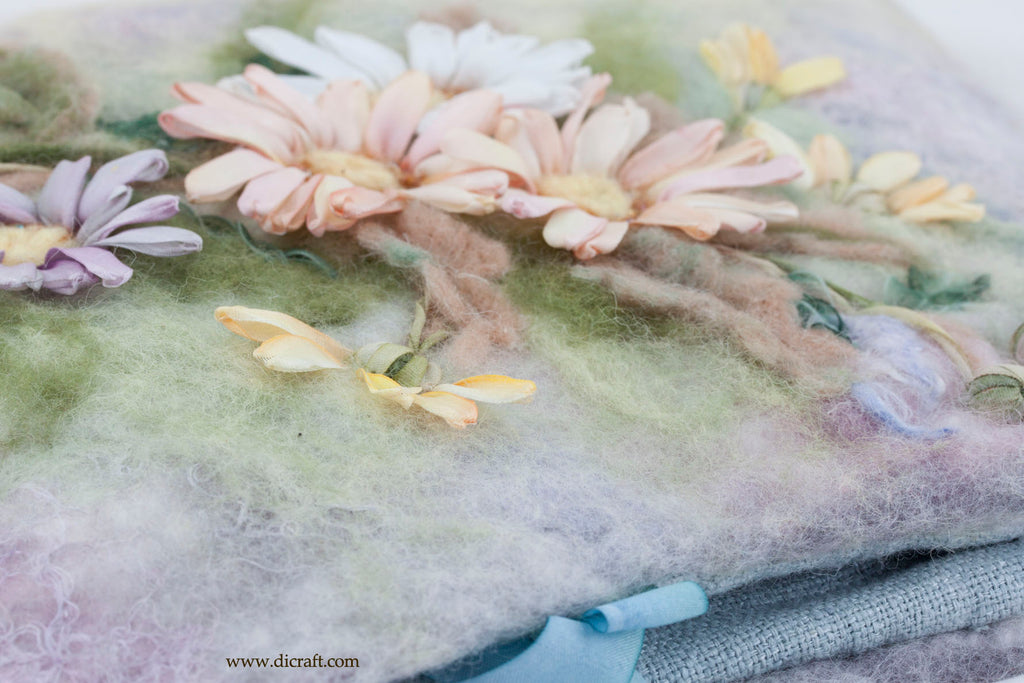
Silk Ribbon Daisies See how these daisies are almost life-like in their appearance, raised up off the surface of the design? An as promised I will show you how these daisies are made… . . How to make Three-Dimensional Daisies in Silk Ribbon Hi, good day from a sunny Cape Town A few weeks ago, I promised to show you how to make silk ribbon daisies with a...
Hi, hello! I promised to show you how to make an orange tree and at the same time, I will show you how to make Forget-Me-Nots or simple daisies. See the RES design below, the second panel on the far right? . . For my RES book, I show how to make an orange tree in a woven basket and in my New Beginnings design, I show you how...
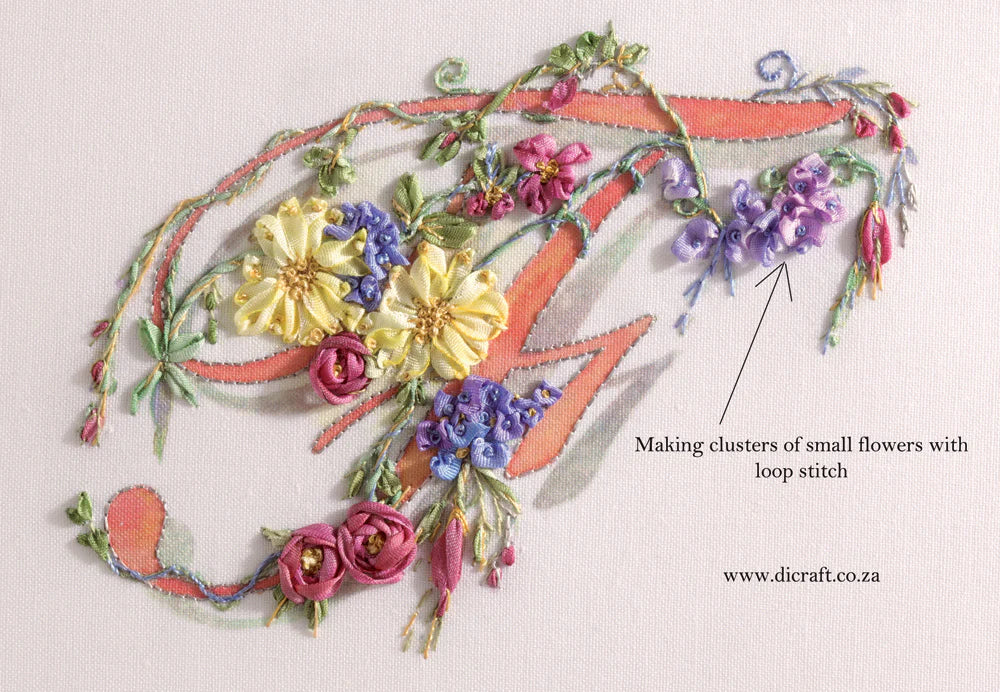
How to make cute little flowers with silk ribbon Loop stitch is ideal for making clusters of small flowers. It is an easy stitch to do and French knots are added afterwards to form the stamens. . . For this F monogram from my Embroidered Alphabets book, I used loop stitch for the little blue flowers. . . Step 1. Use 4, 7 or 13mm silk ribbon...
Hints and tips from Di van Niekerk Trapunto Trapunto (from the Italian word trapungere meaning to embroider) is an ideal method for raising a shape (such as a Fairy) up off the surface of the design. It is a form of padded embroidery where the shape is outlined in small stab stitches, working through all the layers of fabric. The back layer is then cut open and...
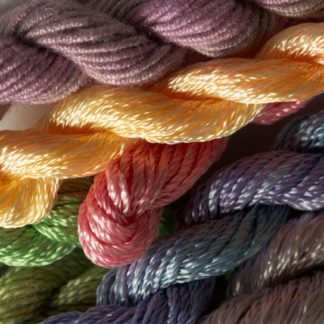
Hints and tips from Di van Niekerk Threading up The general rule for this kind of embroidery: Use one strand of the thread where possible — it always looks better when one strand is used in a design. Rather use more stitches instead of thick, bulky threads to fill in the detail. Separate one strand from the six and thread onto a size 8, 9 or 10...