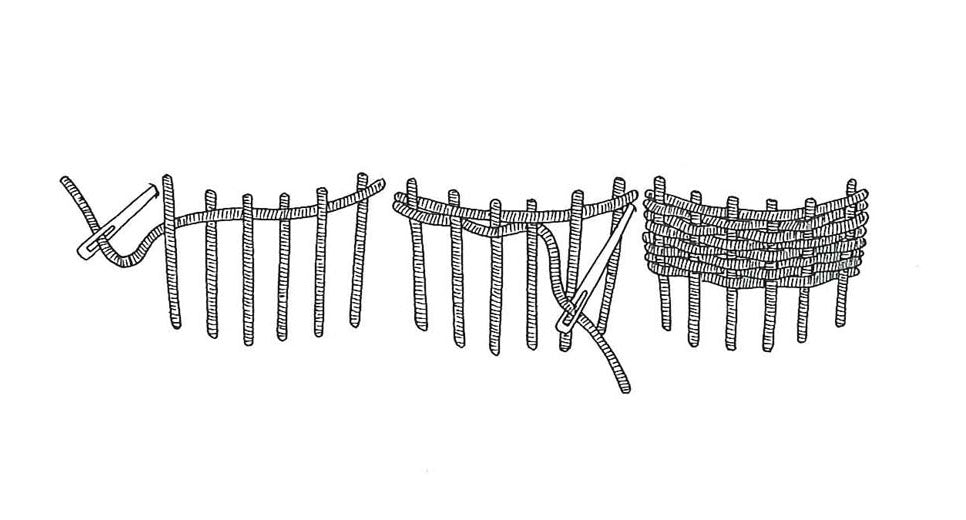
Woven Filling Stitch
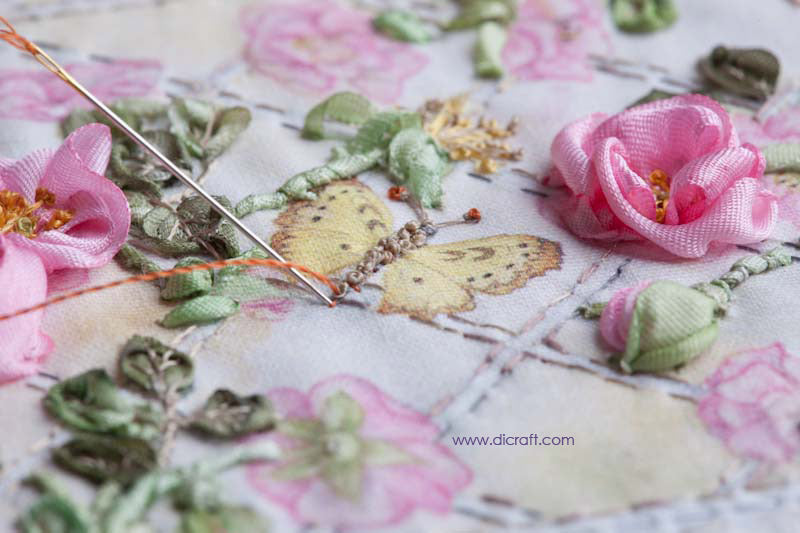
Woven Filling Stitch for embroidered baskets
Welcome to my Blog. This a place to share and learn all things embroidery. Here I post inspirational stories and free lessons in the form of tutorials and guides. I also share tips, tricks and teach stitches and techniques.
You will also find free patterns and designs for you to unlock your creativity. It is a great place for any creative looking to learn or find inspiration in this art form.
To stay in the loop with Dicraft you can subscribe to my newsletter and stay in touch on Instagram and Facebook.
This stitch is ideal for making branches or stems that are raised off the surface of the design. Also, useful when making loops for buttons. First form a foundation stitch in straight, stem or chain stitch. To form a thicker stitch or loop, you can make several stitches alongside each other. For button loops, make the foundation stitch looser than normal so that the loop will fit...
I have to show you this amazing embroiderer's work - Ribbon Embroidery by Annisa Lam of Dancing Needles in Hong Kong! It's from one of our most popular kits/courses - the Pink Delight step-by-step course. This is a fabulous way to learn how to create a stunning piece in silk ribbon embroidery. You can learn online by following here and you can buy the kit (it's on sale while stocks...
Single-knotted stitch is a lovely stitch to use when you need a frilly texture - whether it be in the centre of a flower, for a lacy dress or jersey or a little dog. It is also useful for making other furry creatures and teddy bears. Click on image to enlarge Click on the image to enlargeStitch diagrams are © 2012 Metz Press www.metzpress.co.za and Di van Niekerk www.dicraft.co.za To make this stitch: Make a loop...
How to Embroider Long Hair and Ponytails. I have been asked to show how to make this little girl's hair, so I have written this short step-by-step tutorial. This lovely piece was embroidered for me by the talented Emma Kriegler. Hint: You may find it easier to work on the pre-printed fabric panel titled NR02 Fluffy Friends and Spring Blossoms. You will find the large-size panel here. The medium-size panel is...
Hello, stitching world! It is a stunning day in Cape Town and it's difficult to think about working, but I have not written a blog for quite a while. Have been busy with some beautiful new projects and I have been doing step-by-step photography to show embroiderers how it is done. I often wonder if readers really know how much time it takes to create step-by-step photographs! It never...
How to make oranges - a free tutorial for you ♥ Hello! The sun is shining happily in Cape Town and it's a beautiful day and today I thought you would enjoy learning how to make oranges! Here is the tutorial from my book: Ribbon embroidery and stumpwork. Panel 10 from the flower sampler in the book... Click on image to enlarge A list of what you need for the little orange...
Use this stitch for covering a couched wire, or any object that needs to be attached to your design. Angle the needle as shown and re-insert from the back at the same angle. Work stab-stitch style, taking the thread to the back each time, so the overcast stitch fits snugly against the object attached.
Satin couching Use satin couching for a smooth, raised initial: couch perlé no 8 or 12 thread or six strands of cotton thread in place (see couching). Couch the rows close together; make a few more rows on top of the first layer, especially towards the centre of the initial. By stitching two (or even three) layers on top of one another, the initial will be nice and rounded. Thread...
Stem Stitch Filling is row upon row of closely packed stem stitches. Make the first row of stem stitches, stitching along the edge of the shadow outline, then make a second row alongside, repeating until the shape is formed. Enjoy!
Get regular newsletters packed with tips, specials and new products!
Copyright © DI VAN NIEKERK. ALL RIGHTS RESERVED.
Added to cart successfully!