# Type at least 1 character to search # Hit enter to search or ESC to close
FREE SHIPPING for all orders over $200 ♡♡♡
Search
Browse by Category
-
-
Silk Ribbon and S...
Apr 05, 2025 -
Beautiful Ribbon ...
Mar 22, 2025
Recent Posts
- April 2025
- March 2025
- February 2025
- January 2025
Blog > Twirled Ribbon Rose

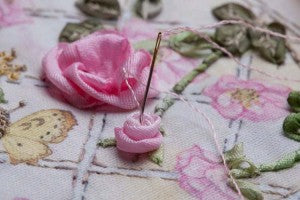
This is one of the roses that I teach in my new Roses book The twirled ribbon rose is a wonderful technique to use for small roses and buds. Step 1. Here I am using 7mm silk no. 92 on an 18 chenille needle. Come up in the centre of the rose…..
Step 2. …..and gently twist the needle to form a neat tubular shape.
Step 3 … keep twirling the needle until the ribbon forms a neat tube.

Step 5 ….twirl the ribbon with your fingers; hold the twirls…
Step 6 …. Whilst holding the twirled ribbon, pull needle very gently to the back….

Step 7 ….until a rose is formed. Pull gently until you are happy with the size of the rose. Pull very softly as you don’t want to pull the ribbon all the way to the back.
Step 8 Use tiny stab stitches, French knots or beads in the centre to secure the rose.

You will learn more about this lovely rose in the various chapters of my new Roses book.
Have a look here on YouTube for my video clip which may help as a guide. Enjoy your weekend
♥
Shop Dicraft
Browse Dicraft
General Info
Get regular newsletters packed with tips, specials and new products!
Copyright © DI VAN NIEKERK. ALL RIGHTS RESERVED.


Leave a comment