Welcome to my Blog. This a place to share and learn all things embroidery. Here I post inspirational stories and free lessons in the form of tutorials and guides. I also share tips, tricks and teach stitches and techniques.
You will also find free patterns and designs for you to unlock your creativity. It is a great place for any creative looking to learn or find inspiration in this art form.
To stay in the loop with Dicraft you can subscribe to my newsletter and stay in touch on Instagram and Facebook.
Blog >
how to
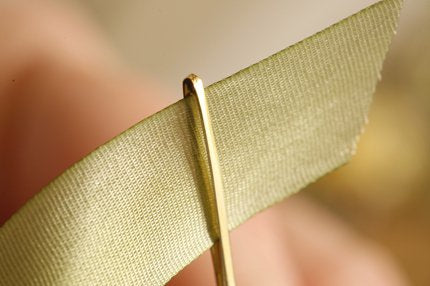
Making a looped knot Step 1 Thread the ribbon onto a needle. To make a looped knot at the end of the ribbon: fold the long end of the ribbon once or twice and pierce it with the threaded needle.... . Click on the images to enlarge . . Step 2 ....gently pull the...
Read More
. Threading ribbon: Step 1 Use a chenille or tapestry needle that has a large (long) enough eye for the ribbon to fit into.... Click on images to enlarge . . Step 2 Pierce end of the ribbon that you inserted into the needle.... . . Step...
Read More
Hi everybody – hope you are enjoying your Tuesday :) Today I thought I would teach you some of the sections from the Dreamscapesdesign – WH06 (the curtain) [singlepic id=856 w=620 h=540 float=center] About the curtain The curtain was made with 38mm organza ribbon number 103. There are two drops for this curtain. 1. Cut two lengths of ribbon long enough to make a knot in the curtain —...
Read More
Make one or many French knots in the centre of the rose. Use two strands of thread, and wrap two or three times around the needle. Or you could use 2 or 4mm silk ribbon and wrap it once or twice around your needle. Form the petals of the rose with a stem or straight stitch, working in a circular pattern. Keep going back between the previous stitches as...
Read More
French knot French knots are ideal filling stitches for background trees and other detail. Also useful for the centre of flowers. For finer detail, use one strand of thread (separate one strand from the six) For a heavier texture: use 2 or 4mm silk ribbon or perlé thread. Come up from the back and wrap the thread or ribbon two or three times around the needle. Insert the needle...
Read More
[singlepic id=832 w=320 h=240 float=] Click on image to enlarge Good morning stitching world :) This is the latest design from the Dreamscapes series and I just love the tranquil shades and the interesting dimensional effects that were created with simple stitches by Emma Kriegler. See how the leaves are made with ribbon stitch? I will tell you a little more about the leaves and the bicycle wheels in...
Read More
Click on image to enlarge Couching: To form interesting stems and branches, or to make basket handles or bicycle wheels, couch thicker yarns or wire in place. This is a good stitch to use when the yarn is too thick to thread up in a needle. Use one or two strands of thread and couch in place as shown. See page 22 of my book: Flower Fairies™ in ribbon...
Read More
Detached chain stitch or lazy daisy: A single stitch is formed at a time for interesting leaves and a circle of stitches makes a lazy daisy flower. Come up and make a loop. Take the needle and ribbon all the way to the back, holding the loop in place. Come up inside the loop and secure it in place with a tiny stab stitch. Take the needle...
Read More
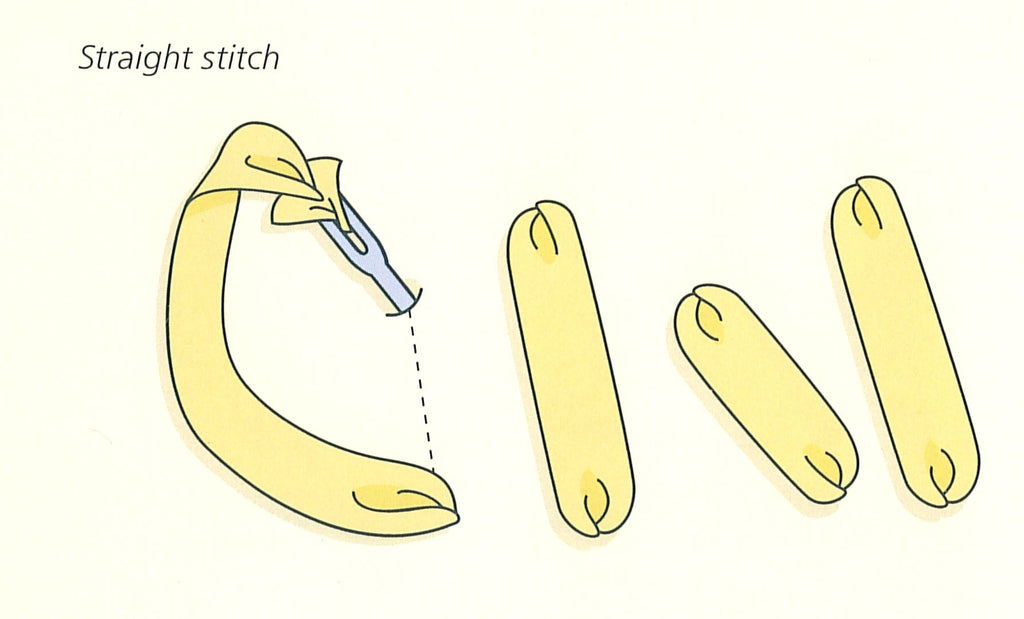
Straight stitches, worked with ribbon in different lengths, are ideal for making stems, blades of grass and thin, pointed leaves. Best worked with the fabric stretched in a hoop or frame. It is a good idea to work over a spare tapestry needle (or similar object) when you make the stitch. This way, the stitch is slightly raised up off the surface of the design. Remember to work with a...
Read More
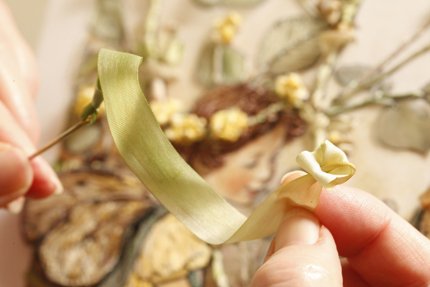
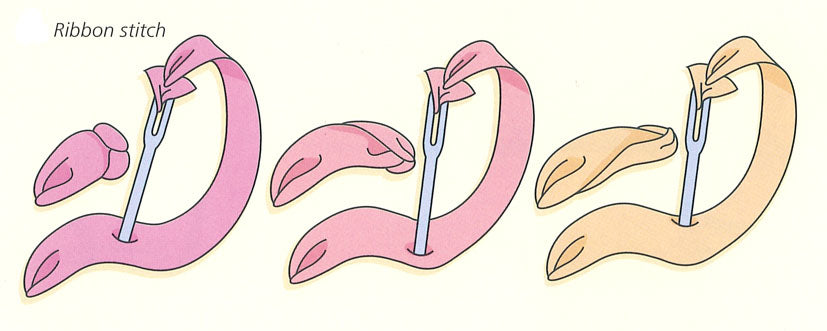
. To make the stitch, pierce the ribbon before taking the needle to the back. Hold the stitch with your finger as you pull the ribbon through your fabric and stop pulling as soon as the stitch curls up on the edge. If you pull the ribbon too far, it becomes a straight stitch. Don't worry, simply make another stitch on top - this adds texture to your...
Read More
Translation missing: en.general.search.loading


